What's Maia and how to install it?
Learn all you need to know about Maia, your Medical AI Agent - how to download, install, and make the most out of it
What's Maia?
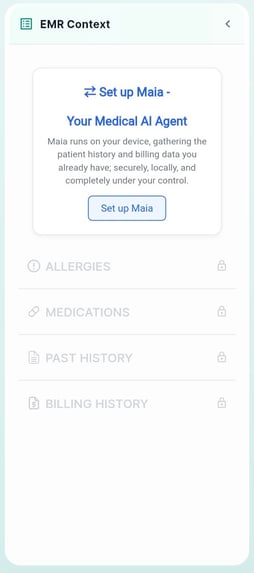
Maia by mAIscribe is your Medical AI Agent (MAIA).
It's our new desktop app, that syncs securely with the EMR.
It is currently compatible with BP on a Windows environment.
It runs locally, privately, and under your full control and allows you to refer to your structured data.
This includes:
-
Real-time visibility of patient medication, history and billing
-
Auto-filled fields to reduce double-handling (Name, gender, age)
-
New Action Assistant that highlights billing opportunities (see Service Opportunities)
Step-by-step Installation Guide for Windows (including the Remote Desktop Connector)
Watch Maia in action
How to Setup Maia (written guide)
Below you'll find the steps to setup Maia and the RDP connector on a Windows. If you are using a Mac or other non-Windows device via a Remote Desktop, check this article.
You can find a full step-by-step video at the end of this page
- Click the "Set up Maia" button on mAIscribe

- Select your EMR
Please note that you will only be redirected to the next step if you have selected a compatible EMR. If you choose any other EMR, we will log that selection and notify you when support becomes available.
- Select your Connection Method
Note: If you connect to your EMR via a Remote Desktop connection (RDP), you'll also need to install the Connector Tool. Both will be downloaded at the next step.
- Click to Download Maia (+ Connector tool if needed - both will download at the same time)
You'll also have access here to watch a quick setup video.
- Run the installer (See Important "Run the installer" section below)
- After you've installed and logged in (See section "Login to the mAIscribe Sync app" below)
Once you are on this screen you can click "Check Connection" to test the process has worked correctly.
Run the installer
Attention: Check your setup before getting running the installers.
1) If you use a Remote Desktop (now called Windows App):
- Install Maia in the Remote Desktop and
- The RDP Connector in the LOCAL desktop.
2) If you don't use RDP
- Install Maia in the local desktop (no need for the RDP Connector).
If these are installed in the wrong places, the sync won't work and you'll need to uninstall both and start the process again.
- The installer is a
.exefile. You simply double-click to launch and follow the install wizard. - Important: Maia should be installed in the same instance of Windows that you see your EMR when you open a patient file.
- Important: If you use a Remote Desktop, install the Connector Tool in the same instance of Windows that you see the shortcut to open RDP (your local desktop).
- If you’re missing packages needed for the app to run, a pop-up will guide you through installing them.
Login to the mAIscribe Sync app
- Once you've finished installation, it will prompt you to login. Use the same email and password you use for the web app.
- Once signed in, you’ll stay logged in between sessions.
- Maia will appear in your system tray - bottom right corner for Windows

- Right-click to sign out, exit, or manage the app.

Tips for Shared Workstations
If you share your computer with other clinicians, always sign out of Maia after your session to prevent system confusion.
Troubleshooting
If you are having issues - check this article to help identify the issue and help fix it.
Check this article to learn the expected behaviour of Maia.
Disclaimer: mAIscribe is not affiliated with, associated with, or endorsed by Best Practice.
![mAIscribe - main logo - hi-res (4000 x 1000 px).png]](https://help.maiscribe.com.au/hs-fs/hubfs/mAIscribe%20-%20main%20logo%20-%20hi-res%20(4000%20x%201000%20px).png?width=200&height=50&name=mAIscribe%20-%20main%20logo%20-%20hi-res%20(4000%20x%201000%20px).png)
